Showing posts with label DIM. Show all posts

Saturday, March 22, 2014

Files

This is my second try on this post so I hope it actually saves this time.  

Okay, here is my latest DIM project.  
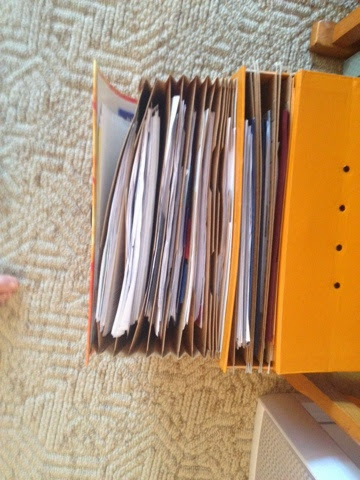
I had to create some kind of filing systems because as you can see below, I had quite the mess on my desk.  My previous system: black file cabinet to the left with receipts in large manilla envelopes from the previous 4 years, lots of stacks on top of desk, file/storage boxes under desk.  

It was NOT working! I could not find a document if I wanted one and I had so many pages crammed in the file that it was literally falling apart.
I forgot to take the step by step pictures but I will explain the process.  
I started with the bottom drawer and thought it would be easiest to just ModPodge an entire piece of scrap paper on the drawer then do a second piece over top to cover the last opening.  This turned out to be quite challenging and was hard to get the entire piece to lay flat.  
On the 2nd drawer, I decided to tear strips of the paper and try that.  It worked so much easier and it a little more interesting looking.   
I am not sure I love the final look yet but I just wanted to get to filing my papers so I left it for now.  I might try it again this summer when I have more time to experiment with it.  

I saw on another blog (can't remember the name now) a very effective filing system that was all color coded and in a super cute filing cabinet with nice little baskets on top.  While I did not want to spend that kind of money, I figured I could make something similar that would do the job.  It may not look like much, but it is wonderful to have labeled files for all of our important documents.  They are so much easier to file and find now!


Here is the final product.  You can see that I kept the black file cabinet as it is still storing some crafting items and the perfect spot for my lovely plant.  Notice how I can actually have a chair at my desk now because I do not have all those silly filing boxes underneath.  I tried to match the scrapbooking paper to my chairs (grey chevron) with the hopes that a chair might be near the file drawers. 
Yes! 
Success!!!


Wednesday, September 18, 2013

Chicka, Chicka, Word Wall

As a second year teacher, I feel like I have much better ideas than I had the first year.  My first year, I made a word wall that was pieces of paper stapled to the wall.  It was all great until I realized that I wouldn't be able to fit all of my words so I had to rearrange the WHOLE thing.  Talk about a nightmare!  Imagine pulling 200 staples out of the wall just to have to redo them.

This year, I decided I wanted to make my word wall out of cork board.  I found these square cork boards at Hobby Lobby.  Bonus deal: I caught it on a day that cork boards were on sale, 30% off!  They were still kind of pricy so I plan to leave the wall up until I absolutely HAVE to take it down. 

I hung all of the cork boards and alphabet but then decided it looked a little plain still.  That's when I decided to make it a Chicka Chicka Word Wall based on the Chicka Chicka Boom Boom stories.  I made my coconut tree in the corner out of paper and slapped some cut-out letters all over the place like they were climbing up and falling down the tree. 

I absolutely love how the wall turned out.  Another bonus, it makes the whole classroom a little warmer as the cork board is a nice brown color.


Note:  When I first hung the cork boards, I used the command strips that were included.  The unfortunate thing with that was the first week of school was so hot and humid that the entire wall fell down.  I learned that I had to staple gun them to the wall.  

Tuesday, September 3, 2013

New, Old Chairs

Labor Day Weekend Project

With the long holiday weekend approaching, last week my brain was busy thinking of all the projects I could do over the weekend.  I am not the kind of person that sits still well.  I always feel like I should be doing something.  One thing on my list was to recover the dining room chairs.  We have a very nice dining room set that was left in the house we are renting.  The only problem (in my eyes) was the fabric on the chairs.  It was a floral print that looked straight out of the 80s.  I couldn't handle it.

I love when I get a GREAT project idea.  (Travis on the other hand, not as much.)

First thing I had to do was measure the seat of the chairs to see how much fabric I would need.  I measured one chair and then had my engineer (Trav) do all of the calculating to decide how big my piece of fabric would need to be.  With my measurements in hand, I headed to Fargo.

I quickly had to purchase a staple gun and was off to the fabric store.  In my mind, I had pictured a nice, fresh grey and white chevron fabric for my chairs.  As I wandered the aisles of JoAnn's Fabric, my hopes began to diminish.  I saw a super cute lime green chevron fabric but could not figure out how to make that work in the dining room.  I walked one more aisle and there it was!  The exact grey and ivory chevron I had been picturing.  And even better...it was 50% off!!!!  I think it was my lucky day!

I bought the fabric and headed home.  My first step was to iron the fabric so that there would be no wrinkles once I had it on my seats.

Next, I needed to take all of the seats off the chairs.  This was so simple.  I just flipped them over then unscrewed the seat from the frame.  Note the original look of the chairs.

Then I need to cut the fabric. I tried to line my measurement up on the point of the chevon so I could keep my line straight. I cut the fabric into three long pieces then cut those in half to get my six pieces. 

Now it came time to staple. I centered the chair seat on my piece of fabric. Notice that I left the old fabric on. I was nervous that if I took it off, the padding would also come off. Starting on one strait side, I stapled the fabric. I did all of the straight sides, making sure to pull it tight, then went back and did the corners. 

For the corners, I pulled the sides together then folded the corner point straight towards the middle of the board. 

I stapled any extra sides/areas that might've been sticking out. 

Here is a before and after of the seats. I am loving them so far! (I was absolutely giddy at this point.  Travis could barely stand me. I kept asking him to screw the chairs back together for me because I was so excited to have them done.)


Here is the finished product. I simply screwed the seat back onto the frame. 

I LOVE my new, old chairs!!! They were so easy and make my dining room look so fresh and bright!